Table Of Contents
- What Is 35-ds3chipdus3, And What Is Its Purpose?
- Why Are People So Curious About Learning How To Install 35-ds3chipdus3?
- Always Start By Preparing Your Workspace And Tools For Installation
- How To Install 35-ds3chipdus3: A Step-By-Step Guide
- Step 1: Power Down And Drain
- Step 2: Open And Organise
- Step 3: Ground Yourself
- Step 4: Locate The Slot
- Step 5: Master The Alignment
- Step 6: The Insertion
- Step 7: Cooling And Closing
- Step 8: The Big Moment
- What Are The Post-Installation To Dos?
- 1. Close Up And Power On
- 2. Update Drivers And Software
- 3. Verify Your Success
- How To Troubleshoot All The Issues?
- 1. System Won't Boot
- 2. Crashes Or Blue Screens
- 3. Device Not Found
- Maintenance Tips That You Must Follow!
- Real Case Scenario!
A Step-by-Step Guide On How To Install 35-ds3chipdus3 For Optimal Performance
Maybe you just caught yourself staring at a sluggish device, which can be frustrating! But you don’t need a new gadget to boost speed.
Upgrading with the 35-ds3chipdus3 is a magic, affordable fix. While those tiny pins look intimidating, you can absolutely do this yourself. If you can use a screwdriver, you are ready to go.
You might feel a bit shaky holding such a delicate component for the first time. It is natural to worry about static sparks or bending a pin.
However, anyone can master this with a careful, methodical approach. Think of it as a simple surgery for your tech.
This guide will walk you through every step for how to install 35-ds3chipdus3.
We will discuss from opening the antistatic bag to the final checks. We will make the process safe and easy, even if your skills are basic.
Let’s turn that slow hardware into a fast machine together.
What Is 35-ds3chipdus3, And What Is Its Purpose?
Before you learning how to install 35-ds3chipdus3m, first you need to understand what this tiny powerhouse is all about and what it actually does!
You can think of it as a specialised traffic controller for your device’s internal data. It manages the flow between your processor, memory, and other parts to keep everything moving fast!
Without it, your system can easily hit bottlenecks, especially during heavy tasks like gaming or video editing.
DS3 Technologies Inc. built this chip to work in everything! From desktop computers to smart gadgets.
It has one main job! Which keeps your signals stable and clean! If any of the signal gets shaky, your system might crash or slow down!
So, you are giving your device a stronger means of communication by adding this chip. Consequently, you will notice faster boot times and much better stability.
It is not just about raw speed. It is about making your whole system work together perfectly.
Why Are People So Curious About Learning How To Install 35-ds3chipdus3?
Everyone is searching for how to install 35-ds3chipdus3. This is because we all want our gear to last longer and run faster.
You are in the right place if you want to skip the frustration of slow devices. First, this tiny chip can automatically deliver faster boot and load times.
So, no more staring at that annoying spinning wheel!
Additionally, it can help you to improve energy efficiency. This can help to keep your divide cool and running better.
As a result, you can also save a lot of money by doing it yourself instead of buying an expensive new computer.
Finally, it can help future-proof your tech so you can run the latest software without lag. It is a simple way to get pro-level performance on a budget.
Always Start By Preparing Your Workspace And Tools For Installation
Before you even learn how to install 35-ds3chipdus3, you must prepare a very safe workspace. As we all know, preparation is the ultimate secret to a smooth process. It further prevents permanent damage.
First, you need to clear a hard, non-conductive surface such as a wooden desk. You also need to avoid all carpets, as static electricity can silently kill your chip!
Next, you have to gather all the essentials so you do not have to stop mid-way:
| Precision screwdriver set | No butter knives, please! |
| Anti-static wrist strap | This protects the delicate circuitry from sparks. |
| Device manual | Treat this like a map for your motherboard. |
| Thermal paste | Essential for keeping your new chip cool. |
| Compressed air | Great for cleaning out dust before you start. |
| USB drive | Keep your firmware updates ready to go. |
Finally, remember to bring plenty of patience. It is normal to feel a bit nervous or drop a tiny screw during your first try!
By staying organised and following this list, you can ensure a safe and successful upgrade for your system.
How To Install 35-ds3chipdus3: A Step-By-Step Guide
Ready to learn how to install 35-ds3chipdus3? Take your time and follow these detailed steps to ensure a successful upgrade:
Step 1: Power Down And Drain
First, shut down your OS and unplug all cables. Hold the power button for ten seconds. This crucial step drains residual electricity from the capacitors to keep you safe.
Step 2: Open And Organise
Try to carefully remove the side panel of your case. Put those tiny screws into a bowl or magnetic tray so they don’t roll away while you work.
Step 3: Ground Yourself
You can clip your anti-static wrist strap to a metal part of the frame. This prevents a silent static spark from frying your delicate new circuitry.
Step 4: Locate The Slot
Consult your motherboard manual to find the exact installation spot. If an old chip is currently there, gently flip the locking clips and slide it out without yanking.
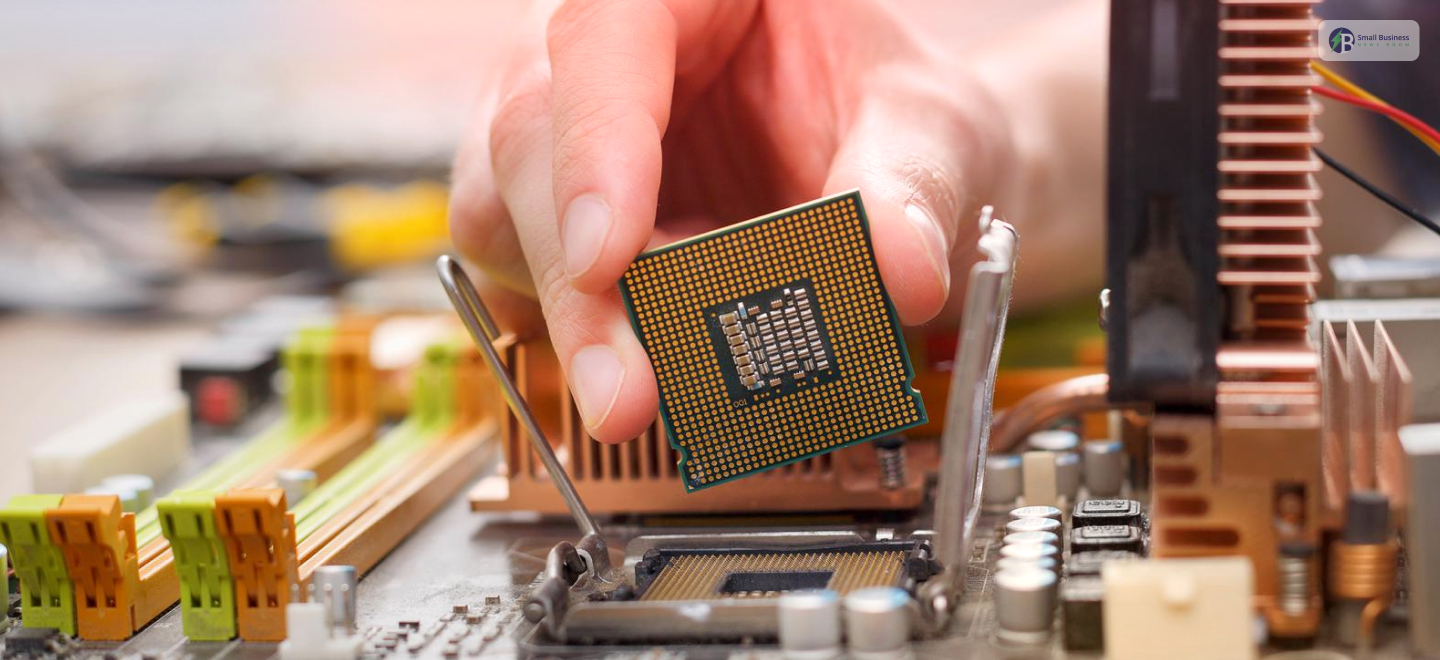
Step 5: Master The Alignment
Try to take a close look at the 35-ds3chipdus3 for a tiny triangle or dot. This marks “Pin 1.”
You must align this perfectly with the corresponding mark on the socket to avoid permanent damage.
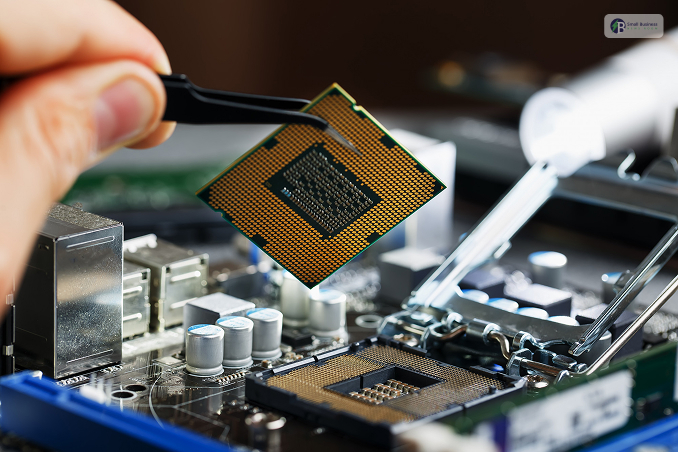
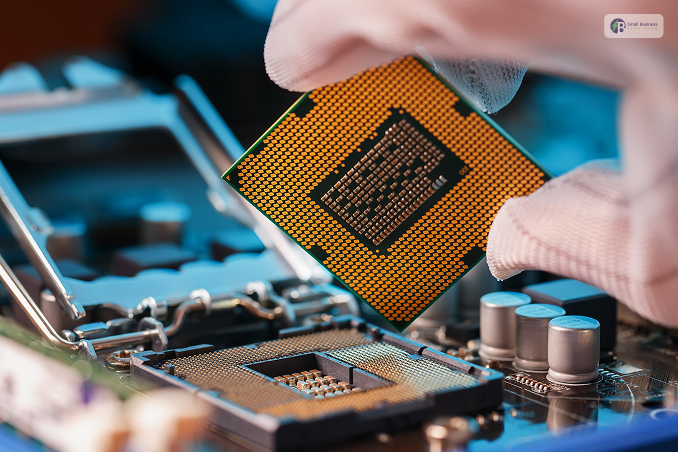
Step 6: The Insertion
Just place the chip into the socket. Moreover, you have to use very light, even pressure until you hear a click or feel it seat properly.
If it doesn’t go in easily, stop immediately and re-check the pins.
Step 7: Cooling And Closing
If your setup uses a heatsink, apply a pea-sized drop of thermal paste in the centre. Finally, slide the case cover back on and tighten the screws.
Step 8: The Big Moment
You just have to plug everything back in and hit the power button. If the system boots up and stays stable, you have successfully upgraded your machine!
What Are The Post-Installation To Dos?

Now that you have mastered how to install 35-ds3chipdus3, the hard part is over! However, you still need to cross the finish line with a few final steps.
1. Close Up And Power On
Before sliding the side panel back, perform a final visual check. Ensure the chip is seated firmly, and no cables were accidentally bumped loose.
Most importantly, check for stray screws inside the case, as these can cause a short circuit. Once clear, secure the cover and reconnect your cables.
Now, take a deep breath and hit the power button! Watch for any error messages or strange sounds during the first boot.
2. Update Drivers And Software
Installing the hardware is only half the battle. To get the best performance, visit the DS3 Technologies website for the latest official drivers.
Furthermore, you must run the installer and restart your computer to make the changes permanent. This ensures your operating system communicates perfectly with the new chip.
3. Verify Your Success
Finally, check your computer’s Device Manager to see the 35-ds3chipdus3 listed. If there are no yellow warning icons, you are good to go!
You can also run a quick stress test to see your speed improvements in action.
How To Troubleshoot All The Issues?
Even if you carefully follow every step for how to install 35-ds3chipdus3, things can still go sideways.
So, do not panic! If your device acts up! Most issues have simple fixes. Just stay calm and work through these common problems logically.
1. System Won’t Boot
If your screen stays black, the chip might be loose! In such cases, you just have to power it down, open the case, and ensure it sits perfectly flush in the socket.
Also, double-check that you didn’t accidentally bump any other cables.
2. Crashes Or Blue Screens
Random freezing usually means driver conflicts or overheating. First, make sure you have the latest software from the manufacturer.
Moreover, if it’s still crashing, check your airflow to ensure the chip isn’t overheating.
3. Device Not Found
If the chip doesn’t appear in your settings, the driver might be incorrect. I once spent an hour troubleshooting only to realize I downloaded the 32-bit version instead of the 64-bit one!
Always verify your OS version before installing.
Also Check: What is Qugafaikle5.7.2? How Can I Get Qugafaikle5.7.2?
Maintenance Tips That You Must Follow!
Once you get the idea about how to install 35-ds3chipdus3, you need to keep it running smoothly.
Moreover, always remember that maintaining your hardware is just as important as the entire setup itself.
Follow these simple tips to ensure your device stays fast and healthy:
- Update Drivers Monthly: You must always check for new software regularly to keep your chip compatible with the latest apps.
- Clean Out Dust: Secondly, you can use compressed air every two months. Dust buildup causes heat, which can slow you down.
- Run Quarterly Benchmarks: You can always test your speed four times a year. This helps you catch performance drops early.
- Scan for Malware: Lastly, keep your system clean to reduce hardware load.
Real Case Scenario!
Before I learned how to install 35-ds3chipdus3, my home office felt like a digital graveyard. I had an old laptop that took 10 minutes just to open a web browser.
Honestly, I was ready to throw it in the bin. However, after swapping in this chio, the transformation was incredible.
What used to be a frustrating, laggy mess is now my go-to machine for video editing. Now, the system boots up instantly and handles heavy files without a single stutter.
It genuinely feels like I rescued a piece of junk and turned it into a high-end workstation for a fraction of the cost.